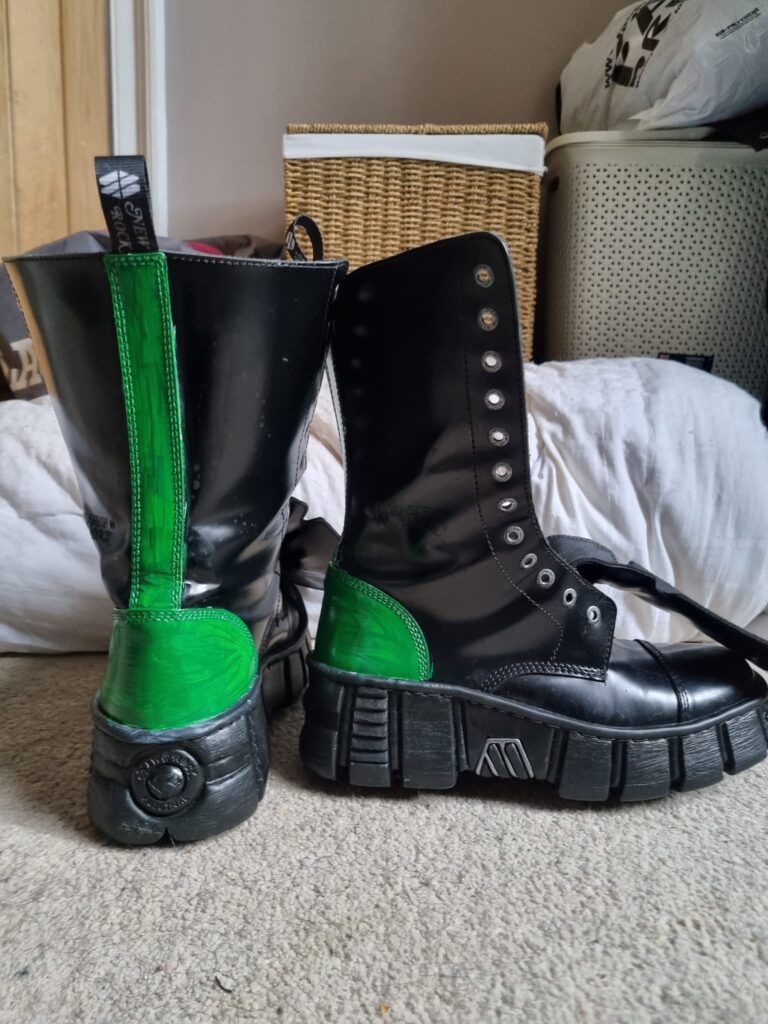
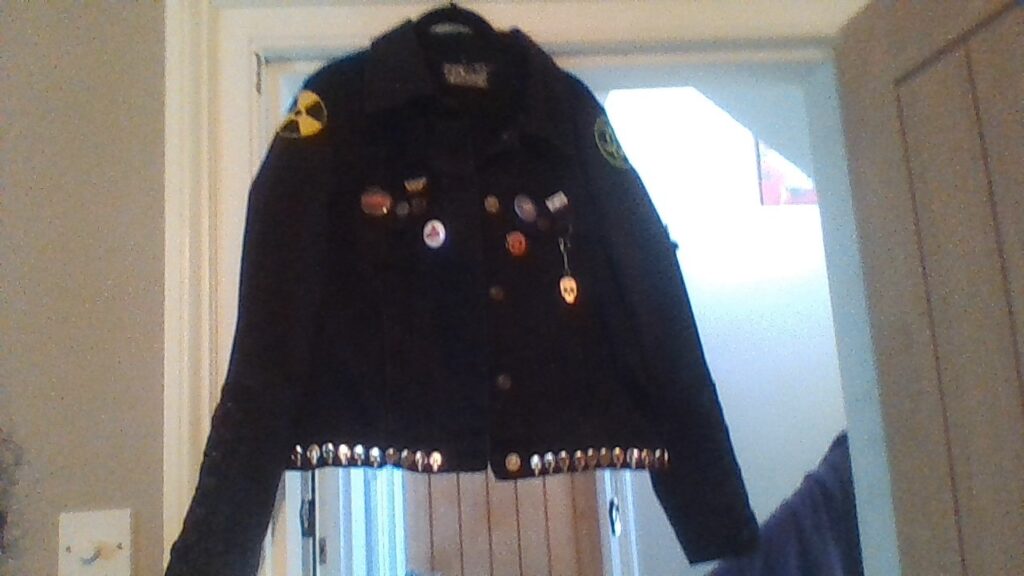
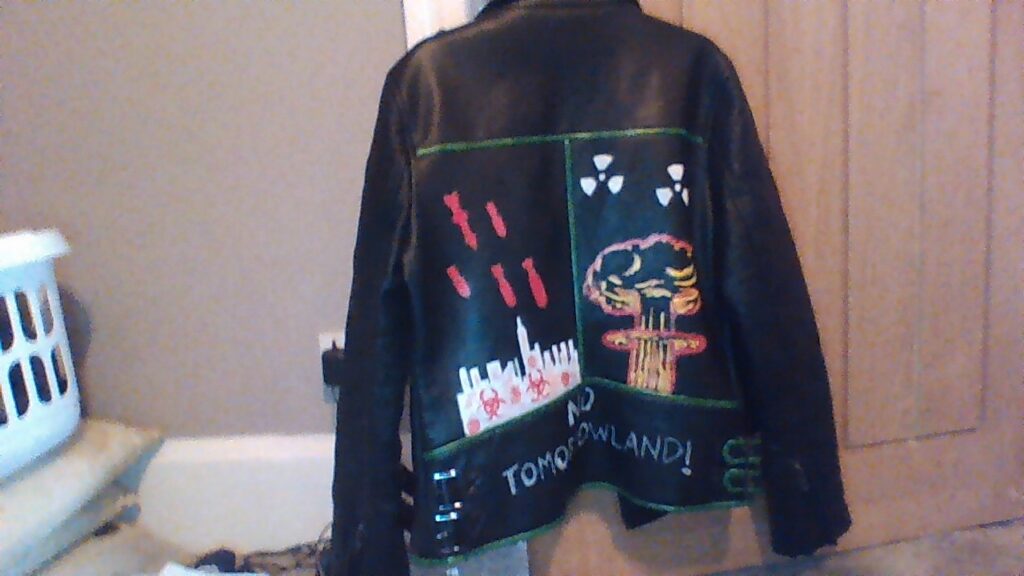
The finished product with which I am very happy with.
Why was doing this a saga? Unbeknownst to a whole lot of people, including myself, New Rock have changed the way they make their boots. Seriously. These boots I got on sale and they are a newer style. Gone are the rubber soles, padded tongues and thick good quality leather. These boots have a PU sole, thinner plastic covered leather and no padded tongue. In other words they have gone down the same route as the bad quality Doc Martens made in China, but still want to sell them for an outrageous amount of money. I wouldn’t be shocked if they actually move most of their production to China, making the really fancy pairs in Spain.
Thirty years ago I painted the back of some 14 hole Docs I owned green and I wanted to do something similar again. I thought it wouldn’t be a big deal and that I could do it the way I did it years ago with no issues. Oh by golly that wasn’t the case at all! I have painted both leather and pleather multiple times before and all I had to do was paint with acrylic leather paint and it would stay put. However, this time the paint slid off of the surface when dry. Seriously. I had even de-glazed the surface before painting and that did nothing at all. So, it was then that I figured out that the leather is actually coated with plastic. Again, not something I have ever encountered before in a DIY project.
To solve all of this I sanded the areas with some sandpaper over the space of two days until the plastic coating was gone. When I tested a spot with some white paint it actually stayed put! It was like a miracle; the DIY gods smiled down upon me! Over the space of a few days I painted the back white two times and then did the same with the green. It looks quite DIY which is the look I was going for since a dystopian/post-apocalyptic style is in no way about the perfection of your outfit.
What can we learn from this?
Never pay full price for New Rock boots. They are frequently on sale so finding them for cheap is not too difficult.
New Rock have changed the way they make their boots. Their newer models are made of plastic coated leather, unpadded tongues and PU soles. From what I understand they are starting to use these same materials for their older styled boots as well.
Never give up on a DIY project, because there will always be a workaround. It may take you a little time to figure it out, but that’s okay!
Doing DIY projects gives you a sense of accomplishment and it is something that gives you your own personal style. It’s a lot of fun and you end up with something that nobody else has or can easily copy. That in itself is very spiffy!
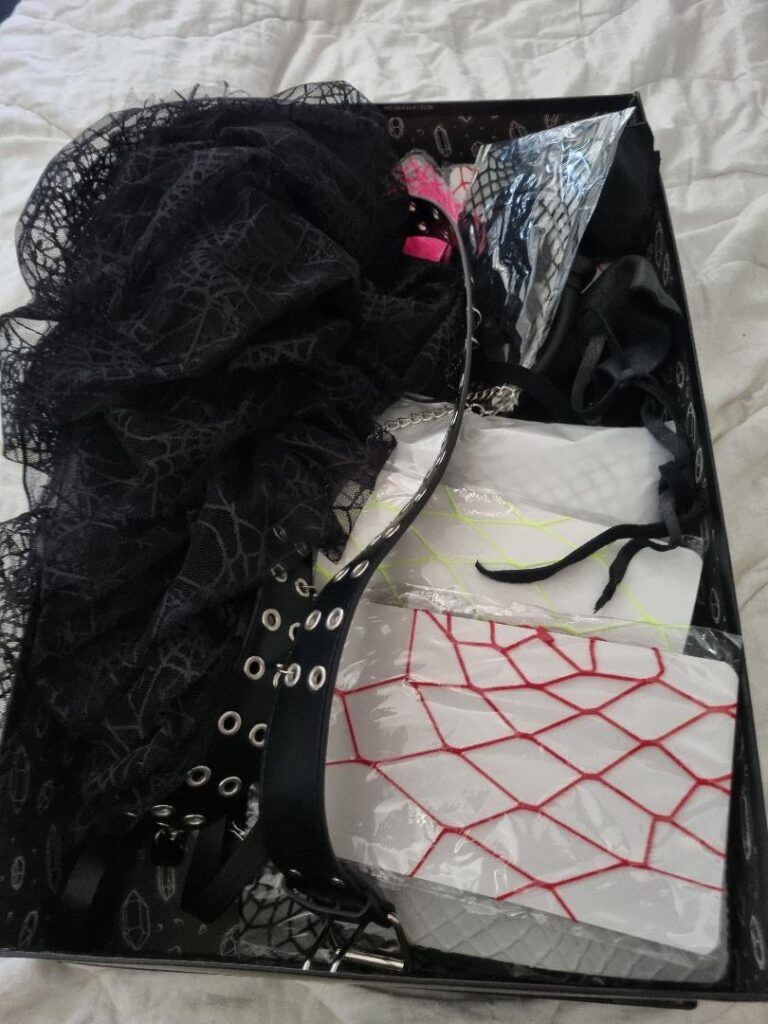
Photo of one of my boot boxes filled with DIY materials that I use for projects.
I originally shared this over in several goth communities on Reddit but I thought that my darklings who read this blog was also appreciate it.
I do a lot of DIY projects. I get my ideas from films, dark clothing websites, Etsy and even Vogue magazine. Don’t ever dismiss something outright as inspiration because there are techniques that you can glean just from the construction of ‘regular’ clothing. I actually taught myself how to dart clothing and I was able to make two different corsets fit my chest better by doing that technique.
Personally, I have never felt comfortable using a sewing machine so I hand sew everything. That may sound daunting but once you practice enough it can be done fairly quickly. All clothing was hand sewn before the invention of the sewing machine, so if somebody stitched a hem by candlelight you can also do it! Honest! All it takes is some practice.
With all of that being said I have two boot boxes filled with the supplies that I use in DIY projects. I have purchased most of them from Etsy. That website is a treasure trove of DIY supplies. I will not name the companies I have bought from because it costs a fortune to ship items across the Atlantic and Pacific oceans right now. Always buy from stores on Etsy that are on, or near, the same continent that you live on. Almost all of my items come from the UK or the EU.
I hope this inspires you to start some DIY projects because it is a lot of fun and you end up with an item that is uniquely yours.
STUDS/SPIKES There are a ton of stores on Etsy that sell these and most of the time they are very affordable. They even come in colors which you don’t actually see on most ready made studded and spiked items. I own a wide variety of them: green pyramids, black pyramids, silver pyramids, skulls, silver studs, black studs,etc… Some Etsy stores also sell beginner kits that include instructions and tools. I also own an awl to punch through leather and a flat headed tool for pushing the ends of them down upon the object.
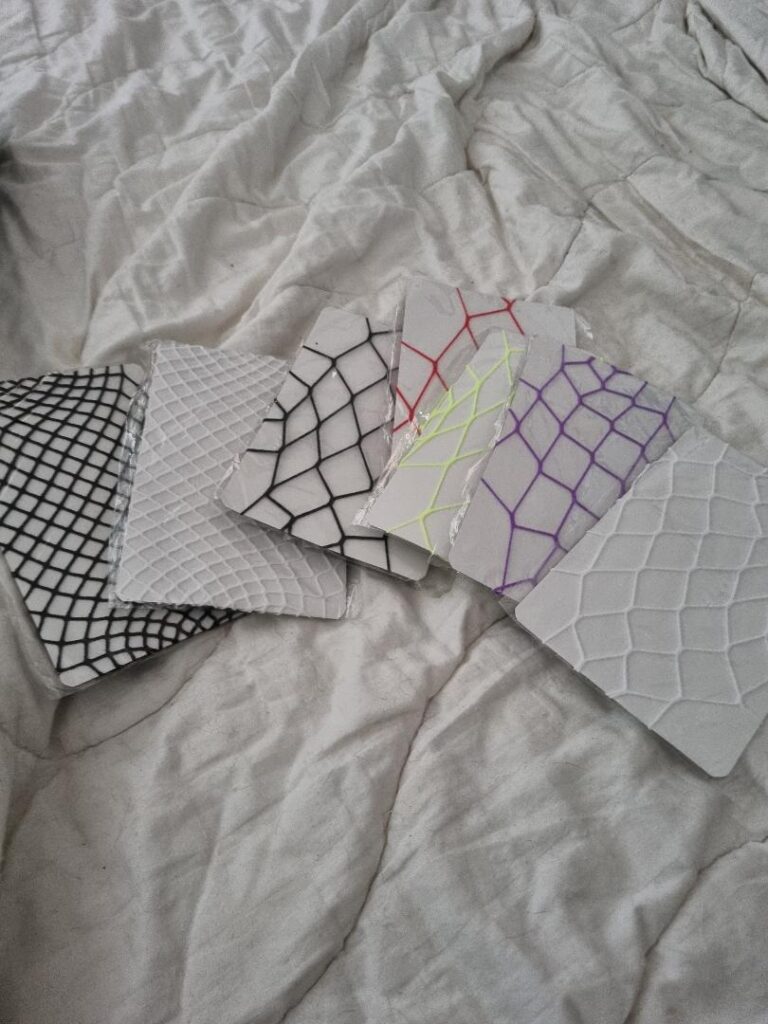
FISHNET I bought multi-packs of fishnet tights in different colors and with holes of different sizes. These can be used to make fishnet shirts. Just cut out the crotch, put it over you head, put the legs on your arms and make holes for your fingers. A much cheaper option than paying £30 for a ready-made fishnet shirt. I also will be using them in other projects, such as layering a jacket collar with it, and safety-pinning it to the sleeves of a jacket.
Some of the many different pairs of fishnet tights that I have for my DIY projects.
NEEDLES AND THREAD You can get small kits that include different colors of thread, multiple sizes of needles, thread rippers, small scissors, measuring tape, etc… I personally always double my thread when I hand-sew anything because it will guarantee that the object will stay together rather than rip easily.
A GOOD PAIR OF SCISSORS Those small scissors that come in a kit are okay for cutting thread but you are going to need a good pair of scissors if you want to cut material. You can get decent ones for fairly cheap.
PATCHES Whenever I see a patch I like I buy it and add it to my collection because I know that I will use it in a project in the future. Many dark clothing sites, and other online alternative stores, will quite frequently have them on sale. However, I have bought most of mine from, you guessed it, Etsy. I have my own post-apocalyptic/dystopian goth kind of style going on and Etsy is a treasure trove filled with patches from films such as Terminator, Blade Runner and They Live. You can find band, horror and anything else you like on there. If you are more brave you can even make your own with fabric paint.
ACRYLIC PAINT, BRUSHES, AND STENCILS An acrylic type paint is what you should use on leather and pleather materials. I bought a kit by Angelus specifically for leather and pleather. You can also use just regular acrylic paint, whatever brand you like the best. I also have some stencils of things such as mushroom clouds and pandemic symbols. You can find a lot of them on Etsy, or you can make your own stencils out of cardstock.
BLEACH PENS AND FABRIC PAINT Bleach pens are seriously awesome because you can either stencil or freehand designs onto any fabric object. They were a game changer for me! Fabric paints are very cool as well. Using them is an easy way to instantly change the look of an object.
FABRIC SCRAPS I never throw away any fabric that I cut off of clothing. The reason being is that you never know what you can use it for in the future.
HALLOWEEN RIBBON I live in the UK where Halloween isn’t as popular as it is in the US. I spent my first 40 years in the US and Halloween has always been my favourite holiday. Whenever I see Halloween themed ribbon on sale online I buy it and add it to my stash, because I know that I will use it in my hair or on an item.
SAFETY PINS You can buy boxes of different sizes or packs of the sizes that you really like. I use them to attach items or as decoration on items.
SPOOKY KEYCHAINS I attach these to zipper pulls, belts, purses,etc… You can buy these in bulk for fairly cheap.
That’s all for now. You do not need a lot of money to do DIY projects. Just buy a little here and a little there and soon you will have a whole collection of things you can creatively use.
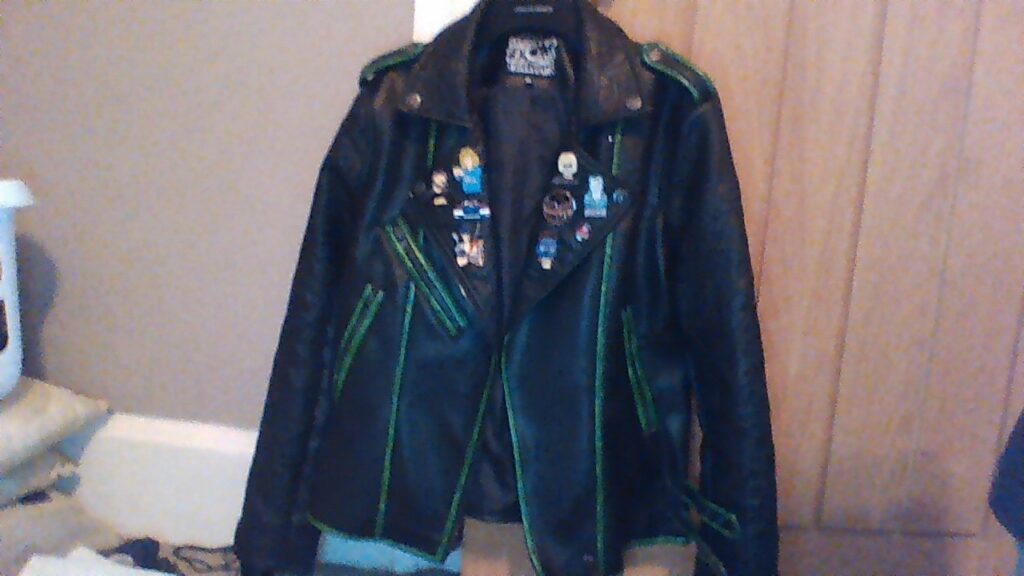
As you can tell from the title of this blog I love anything post-apcalyptic or dystopian themed. I already have my post-apocalyptic pleather jacket but I felt like I needed something for warmer weather. Hence this jacket was born!!
I first featured this jacket back in November. Due to being constantly tired from MS I didn’t touch it for a while. Thanks to a new med I am taking I have way more energy so that I can finally finish this project. Hooray!
Before I get any deeper into this I would like it to be known that I bought this jacket in the clearance section of Killstar’s website. It cost about £30 and it has grommet work and lacing on the sleeves. I’ve never done grommet work so I thought it would be better for me to purchase this rather than attempt it myself. I definitely could have done the ripping and webbing. However, I have done so much to this jacket that it doesn’t look like it’s from Killstar. I find absolutely nothing wrong with buying clearance items from ‘darkly inclined’ clothing sites and doing DIY projects with them. Not everybody lives near thrift stores or can physically get to them. The people who go on and on about how you have to get everything from thrift stores are full of shit.
Front of the jacket.
Here is the list of things I have done to this jacket.
First thing I did was browse Etsy for post-apocalyptic themed patches. No matter what kind of jacket you want to do you will find associated patches on that site. Personally, I always sew patches on rather than iron them. Mainly because an iron on patch can curl up more easily than one that is sewn. Using a double thread instead of a single one is also advised. Some people use dental floss, but I have never felt the need to do it that way.
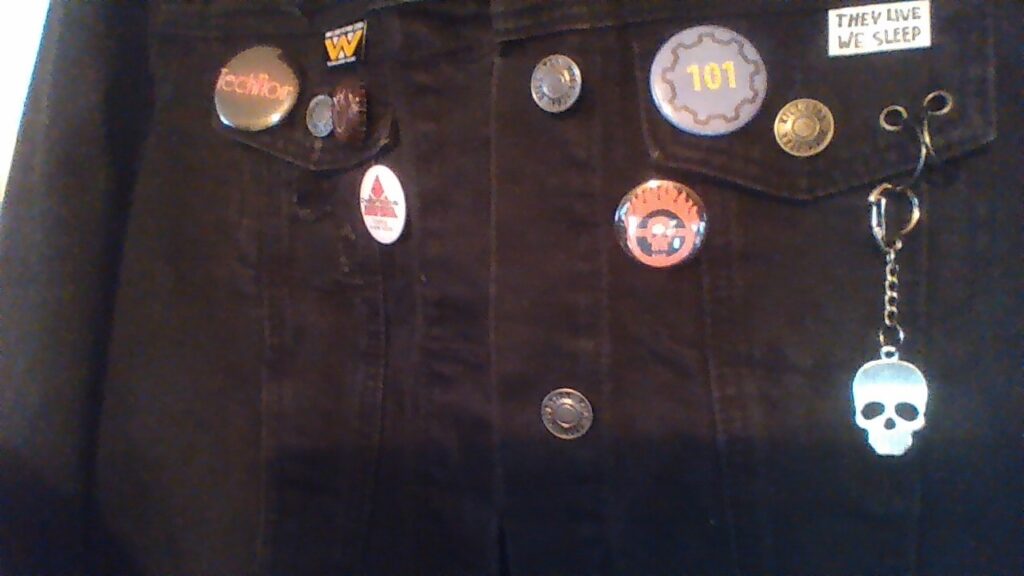
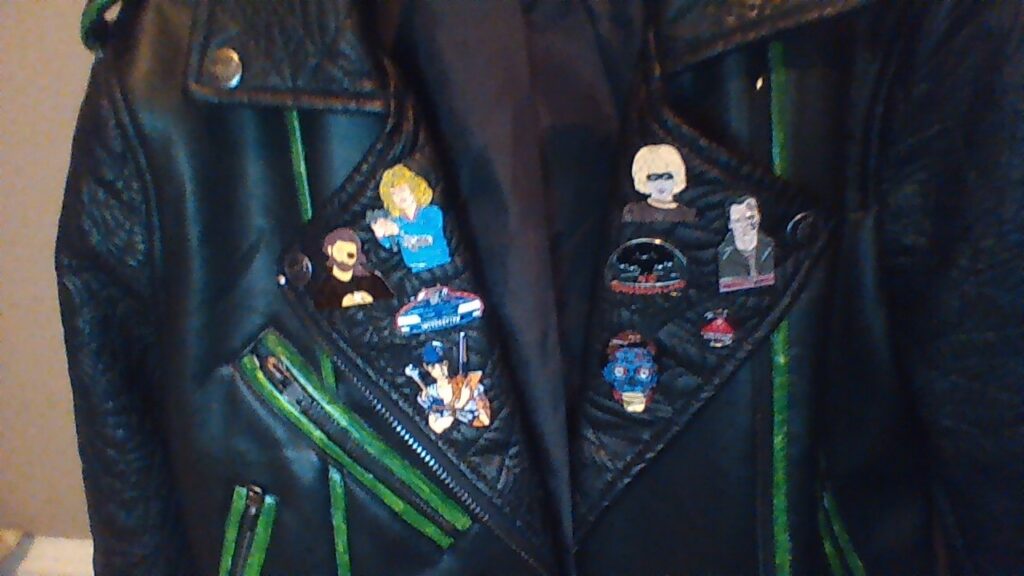
I also purchased all of my pins from Etsy. I have more nice enamel pins but they tend to come off more easily than regular pins in my experience. I have way more pins than this but I don’t want the jacket to look too busy. I think jackets look better when they aren’t cluttered.
Close up of front of jacket.
I used tools to put on the skull studs that adorn the bottom hem of the jacket. Again, I bought the studs and tools on Etsy. Way back when I would use the point of a knife to stud a jacket, but I wouldn’t recommend that! An awl makes it so much more easy. I also have some pyramid and cone studs that I may use on the jacket. In particular some pyramid ones that are the colour of green toxic sludge.
I put large safety pins on either side of the bottom of the jacket and hung some spooky keyrings from them. They are visible in the top photo. I got the keychains off of Etsy, of course. I might put one on the front but haven’t decided yet.
I’ve had a lot of fun working on this jacket and I hope it inspires you. Remember, always work on projects that you like, not what somebody dictates to you. Think for yourself.
Since very bright hair has become very mainstream it seems like more and more brands of bright hair dye are coming out of the woodwork. This itself isn’t a bad thing because what works on one person may not work on another person. What I personally take issue with is the fact that a lot of companies are charging a ton of money for these dyes, and a lot of people who have no experience with these type of dyes are being gouged in more ways than one.
Before I get stuck in I would like to let it be known that I am not a licensed hair stylist. However, I have been dyeing my own hair for about 35 years so I have a lot of experience. I have dark brown hair that is very coarse and consists of three different types of curls. Bleaching my type of hair is very difficult and time consuming. I would bleach it once and then in a day or two bleach it a second time. This would get it light enough to take in a magenta colour and that’s it. These days I would say that 80% of my new hair growth is white, which means that I no longer have to bleach it and I can dye it purple. My hair has been damaged many times in the past but it has never broken off, so my experiences may not be the same as others who have a different hair type.
With all of that being said there is no reason why people should be shelling £20.00 or more for one container of dye when they can get two, three, and in some cases even four containers of bright dyes for the same price. A lot of people wasting their money this way are doing almost no research on the subject. They are taking the word of beauty ‘influencers’ that are making a ton of money off of them by claiming that their bright hair dye is more ‘special’ than others. I’m looking at you Brad Mondo. I don’t care that you are an internet famous hair dresser, I am not going to pay over £20.00 for your bright coloured hair dye.
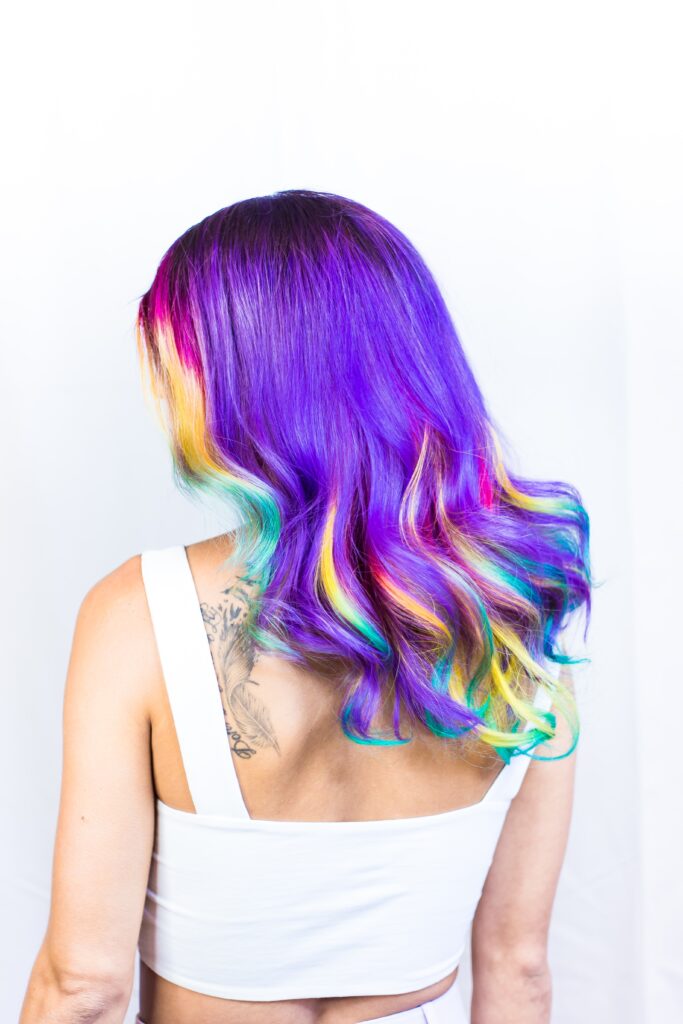
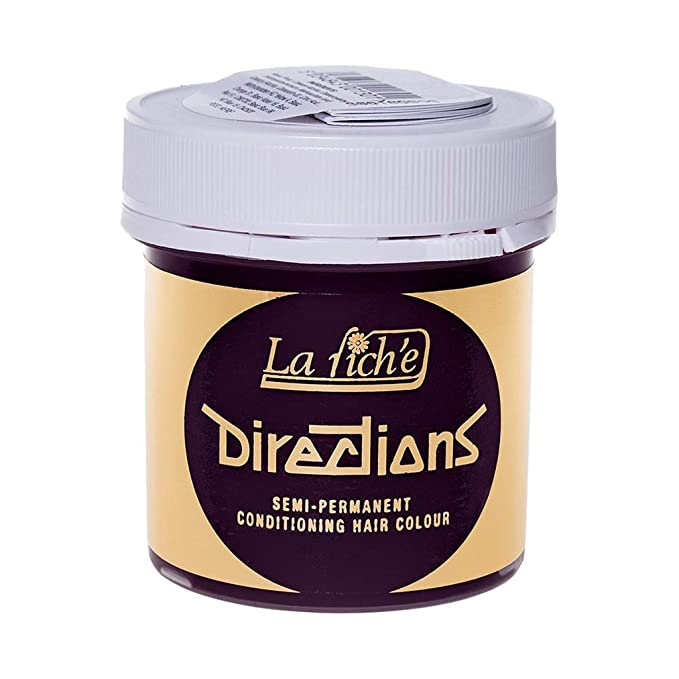
Certain brands work on my hair while others don’t, and that is a pretty common issue. The first main brand I ever tried was Manic Panic and it literally washed right out of my hair. These days it goes for about £10.00 a tub. The brand that I had the most success with when I lived in the US was Punky Colour. It was a little cheaper than Manic Panic and would actually stay in my hair for a few weeks. I would always mix one of their reds with one of their pinks to make my own magenta type colour. It is very pricey if you are living in Europe so I now use Directions, which is probably the most affordable brand out there. I have gotten pots of it for as low as £3.20. Their plum shade has the most cool fade that I have ever seen. Some of my hair will turn pink while other strands will turn a bright blue. When I recently went to get my hair cut my hairdresser was shocked that I had only used one shade to get that kind of multi colour fade.
In the end you can spend your money on whatever bright hair colour brand that you want, but just know that you do not need to spend an outrageous amount of cash. Do some research as to how your hair type reacts to bleach, because if you have dark hair you are not going to get a very bright hair shade unless you lighten it first. Some ads will claim that you don’t have to bleach your hair first. Quite frankly that is a load of shit. Also, ask others with your hair type what brand of dye that they use. If you do these things first before buying a bright coloured hair dye you will not only save money, you will also not be giving liars and grifters your hard earned cash.
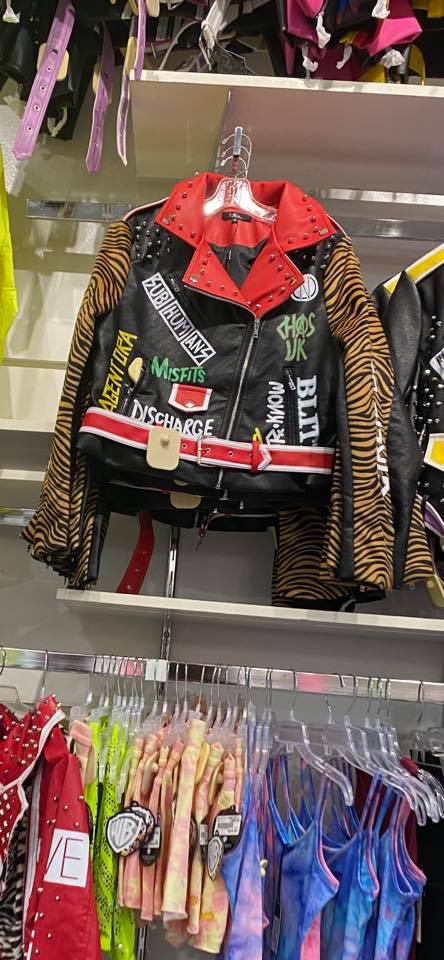
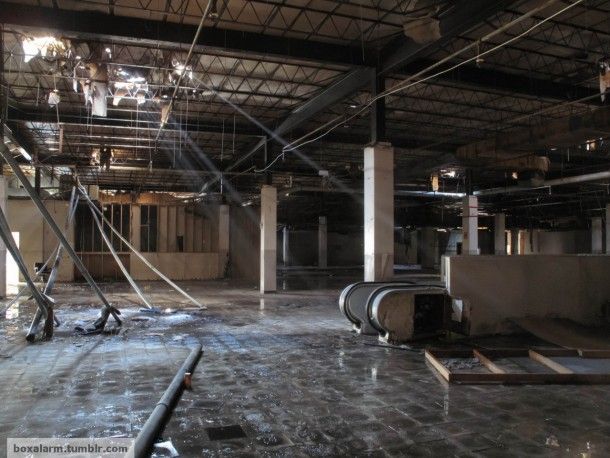
The above photo has been making the rounds on the internet for the past few days. Somebody took the photo in a store called Box Lunch in a mall. Said store is owned by Hot Topic, which really shouldn’t come as a surprise since that company has had a reputation for profiting off of subcultures for about 30 years now. The thing that bothers me the most about this is that people are going to buy these atrocities without listening or even knowing about the bands painted upon them.
The first thing you notice about this jacket is that Agent Orange is shorted to Agent Ora and Dr. Know is changed to RX Know. Oh, and they messed up the name of Chaos UK. I don’t know if it was done out of pure laziness or that they didn’t want to be sued by said bands, but they got the names of the other bands correct so I’m guessing that they don’t really care about the whole getting sued thing. Somebody, in some factory in China or elsewhere, was told what to stencil so they probably had no clue that they were real bands. They have been exploited by whomever came up with this crap. Yes, I see the irony of using the word ‘exploited’.
I guarantee that people who buy this thing are going to get shit for wearing it when somebody goes up to them and wants to talk about the bands on it. It’s exciting to see somebody wear the merch of a band that you really like, and more exciting to have a discussion about them. However when these people are innocently asked about what their favourite band is on the jacket their eyes will glaze over in a panic because they didn’t realize that the names were of real punk bands. They bought the jacket because they thought it looked edgy.
I am all for people buying whatever they want to wear, and I’m realistic about the fact that not everybody can easily DIY clothing. I have multiple sclerosis and quite frequently I don’t have the energy to sew or paint. However, I feel that jackets are the one thing that should be personalized by the person who wears it. It’s a tradition that has been around since the early days of punk in the 1970’s, and something that means a lot to people in the punk, metal and goth subcultures. It shows other people in the subcultures what bands, films, or other things that you are heavily into. It even becomes a focal point of interest that will sometimes turn into a conversation with another person that is into similar things. Yes, sometimes ‘gatekeepers’ will be creeps and try to test you on your knowledge to make themselves feel superior. I’ve had it happen to me and it sucks. Not everybody is a creep though, and friendships can be started over a love of the same bands which is neat!
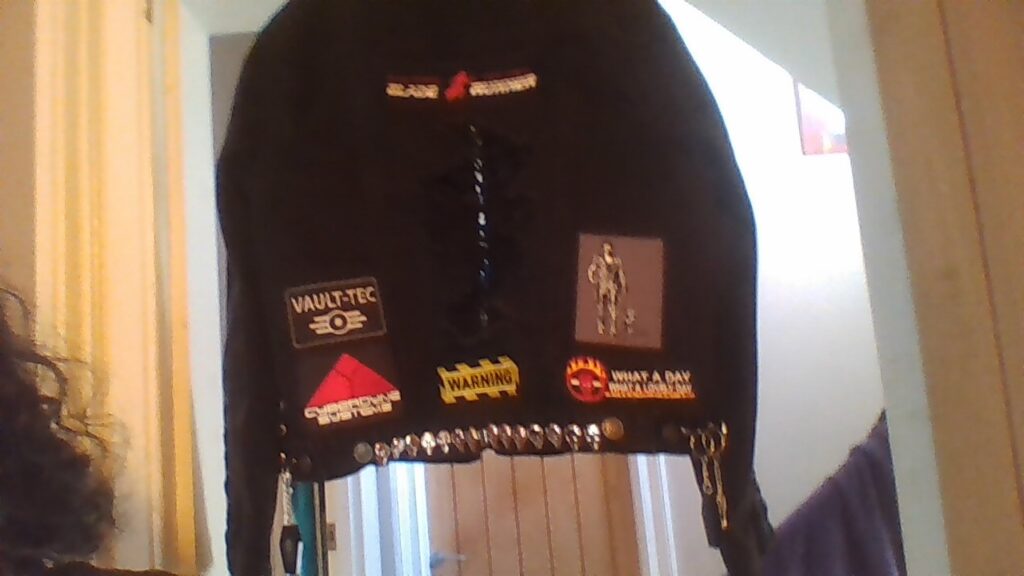
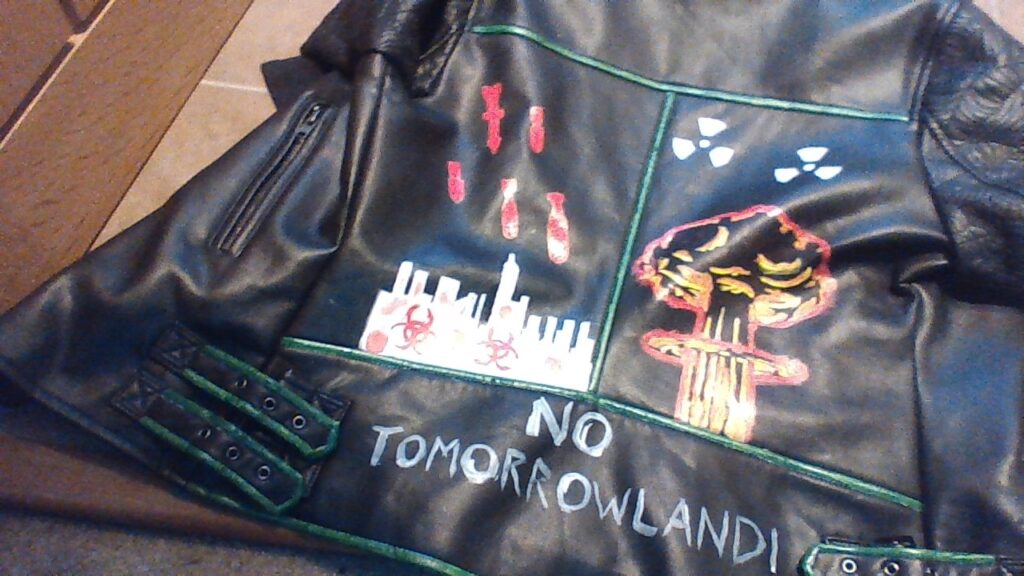
These days it’s really easy to learn how to paint on a leather or pleather jacket. There are tons of tutorials on YouTube showing you exactly how to do it and it really isn’t that difficult of a project to accomplish. You’re not good at painting? You can make a stencil out of cardboard, or any kind of thicker type paper, and do it that way. If what you create isn’t 100% perfect that is okay. You actually don’t even have to put band names on a jacket if you don’t want to. The latest one that I painted, shown below, doesn’t have a single band name on it. I am heavily into post-apocalyptic and dystopian films so I went with that kind of theme. There are also tutorials online that teach you how to stud a jacket and the studs are very cheap to buy on sites such as Etsy.
This is the best looking jacket I have ever painted and I used a combo of stencils and freehand.
When it comes down to it when you buy a premade ‘punk’ jacket you are being exploited by a company wanting to make money off of a subculture that they don’t give a crap about. They don’t care about the long history of the DIY ethos that runs through it. Instead they see you as a rube willing to spend your hard earned cash on their manufactured product in order to look ‘edgy’. Don’t be a victim of their avarice and greed. When you put your mind to it you can accomplish anything you want, including painting bands that you love on your own jacket.
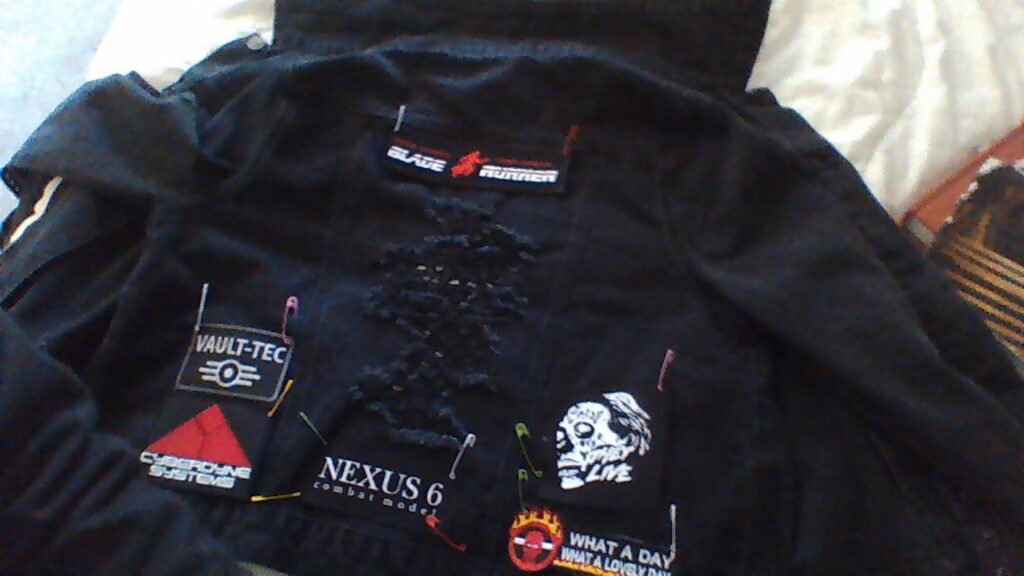
The denim post-apocalytic/dystopian jacket I’m working on. It came distressed.
I originally posted this over on Reddit, but I think it deserves a place on this blog.
Through the years I have worked on quite a few DIY clothing projects, but since the virus started I have come up with a lot of ideas. I wasn’t working before the virus started because I have MS, and that had me really depressed. However, since the world economy is crashing I decided to finally work on some projects that I have always wanted to do. Mainly, I have wanted to achieve a post-apocalyptic/dystopian meets goth look for ages that doesn’t look like a costume. Here are a few of the ideas I have had and I hope this post inspires some of you to create your own style.
I bought a spiderweb pattern pleather jacket and a distressed denim jacket on sale for fairly cheap on Killstar’s site. A regular pleather jacket and a regular denim jacket would have cost me more than these two did. Also, they have features, such as grommet work, that I don’t feel comfortable doing. Plus, if I mess up doing things to them I won’t feel completely heartbroken because I didn’t spend a lot on them to begin with. There is no shame in buying ‘dark’ clothing brand products on clearance, and then using them for DIY projects.
I used Angelus Leather paint combined with some hardener to paint the pleather jacket. Stencils helped me with this greatly and there are tons of different stencils for sale on Etsy. It’s also fairly easy to make them yourself. Just use an x-acto knife to cut out your drawing made on cardstock. I also might stencil some radiation symbols onto some plain knee high New Rocks that I have. Yes, they sell boots without all of the metal crap.
I’m going to sew some post-apocalyptic/dystopian film patches onto the denim jacket. I will also probably stud part of it with skulls and pyramids. I got them, and a very sharp awl, off of Etsy.
I cleaned out my clothing drawers and found some old craptastic bondage belts with chains clipped to them. I am going to take those chains and either put them on the jackets or on some of my messenger bags.
I am going to distress some thrift store finds and use some big safety pins for decoration on them. I will also be cutting up and distressing some ‘goth’ online store finds that I bought on clearance. Things such as ripping off peter pan type collars and replacing them with some torn up fishnet fabric.
Buying a plan black messenger bag and sewing some band and horror patches onto it. I will also probably be studding it to some degree.
Buying some jewellery wire and making some broken jewellery into zip pulls and for clothing decorations. I will be attaching them to zip pulls and bondage belts with some metal clips. I also bought some cheap spooky keychains off of Etsy to use in the same way. Keychains with skeletons, spider webs,etc…
Using stencils, and a bleach pen, I have created radiation and pandemic bleach drawings on black leggings. The leggings I got for very cheap off of New Look’s site.
I will be distressing some film and band shirts. Rather than creating a fancy cut pattern on them I’m going to make more random cuts. I will also be cutting off the sleeves of some of them.
I don’t feel confident enough to make my own jewellery so I have bought some very cool post-apocalyptic themed pieces on Etsy. Those are usually not too expensive. However, the ready made post-apocalyptic themed clothing is usually very expensive! Most of it looks very cosplay, but I have found some very cool skirts that I can pair with a plain top so that it doesn’t look like a costume.
Etsy!!!! Etsy!!!!! Etsy!!!! If you haven’t guessed by now I get a whole bunch of my craft supplies, patches, jewellery, bondage belts, band shirts,etc…off of there. Most shops on there are reasonably priced, especially when it comes to studs and spikes. Also, head over to Bandcamp for shirts and patches because some bands have them for sale on there.
I really hope that I have helped and inspired you, because it is always fun to do DIY projects.
As a lot of you know I am a total post-apocalyptic/dystopian genre fangirl. I’ve been into the genre since the early 80’s and I have always loved the way that the characters in such films look. For example, the baddies in The Road Warrior (AKA Mad Max 2) have always fascinated me. Where did they get all of the cool black gear from, and how the hell did they put their mohawks up in a desert wasteland with no beauty supply shops nearby? Also, where did the find the brightly coloured hair-dye at?
As I slowly discovered the joys of goth and punk music there was something in the back of my brain telling me that I should combine the two as to how I looked. There were some years I looked more goth and some years in which I looked more punk. I was never successful at combining the two together seamlessly into a cohesive look.
I got diagnosed with MS about 3 1/2 years ago and within a short time I couldn’t work any longer. So, I decided that I was going to start dressing how I really wanted to, and do whatever the hell I liked with my hair. I was going to start dressing in a post-apocalyptic/dystopian style by golly! As I searched Etsy for items, and ideas, I noticed that the clothes and accessories came in two different varieties; costumes for festivals and actual wearable items. The costume items are really over the top, such as heavily stained clothing, colourful gasmasks, home-made shoulder pads and jewellery . I’m not dissing those items because they are often very creative. However, you do not want to wear all of these kind of items together while shopping or walking about because it’ll look like you are just wearing a costume rather than wearing actual everyday clothing.
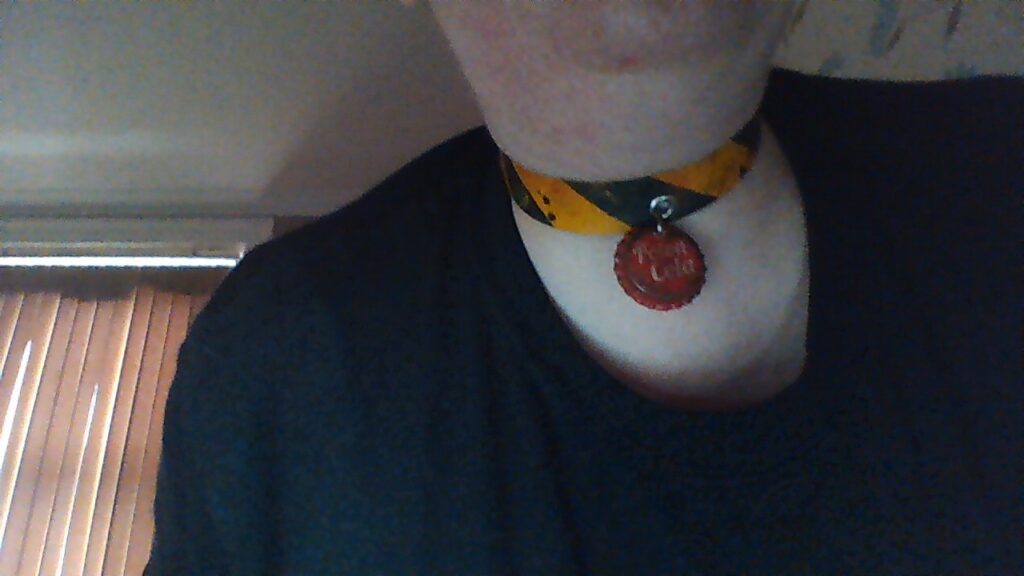
A very cool choker that I bought on Etsy.
A lot of the wearable items that I have seen on Etsy are made in small batches and can be very expensive. If you have the skill and patience to do so it is cheaper, and more original, to customize your own items. So far I have painted my post-apocalyptic pleather jacket and have stencilled with a bleach pen symbols onto some leggings. I plan on distressing a few knit items that I own and sewing some patches onto a black denim jacket and a plain black canvas messenger bag that I have purchased. I have bought quite a few pieces of jewellery because I don’t feel confident making such things myself. With some broken jewellery and wire I plan on decorating some of my items. Also, I have found some very fab bottle-cap keyrings on Etsy that I plan on making into zip pulls and decorations.
The balance between costume and clothing in this style is all about limiting costume pieces to maybe only one item in an outfit. Have a ripped up skirt? Wear it with a top that isn’t as damaged. Have an over the top choker? Pair it with an outfit that isn’t as decorative. I stay away from goggles, gas masks, and shoulder-pads because they all scream costume, and I don’t want to be mistaken for a cybergoth. I also stay away from tons of bright colours, so I will wear only one brightly object at a time if I wear any at all.
I hope this post inspires you to come up with your own individual style because it’s a very fun journey to take.
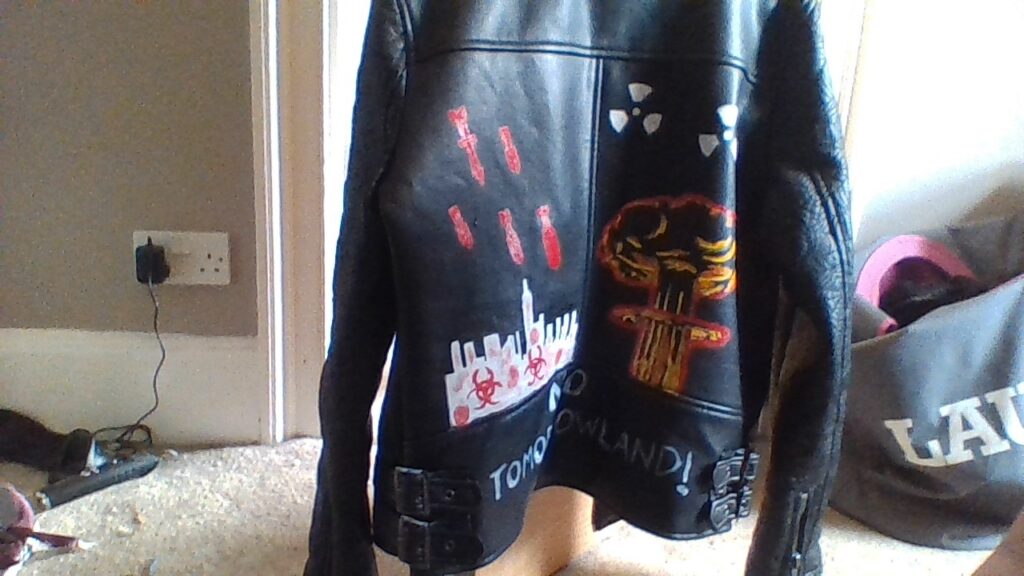
This jacket is pretty much the collimation of years of post-apocalyptic book and film fandom. Considering how utterly crappy the world is right now it is also timely. We are in the midst of a global pandemic and economic meltdown and this jacket faces it head-on. No butterflies and toxic happiness.
This is an actual pleather Killstar jacket that I got online for really cheap. It has features to it that make it ripe for DIY work. I know that some DIY enthusiasts would give me shit about this fact, but why should I spend hundreds on a similar style jacket? Plus, if I majorly messed up on it somehow it wouldn’t get me bummed because I didn’t spend that much on it.
On the back I used a deglazer to get the dirt off of the surface before painting it with Angelus acrylic leather paint. This was my first time painting on pleather so I added a hardener to the paint so that it is more flexible and won’t crack as easily. I started all of the painting with a layer or two of white paint first so that the other colours would pop more. I didn’t add a hardener to the green paint because if the piping looks raggedy that doesn’t really matter because it would be easy to touch it up. Lastly, I used stencils for the bombs, mushroom cloud, cityscape and the radiation/pandemic symbols.
I got all of the pins on the jacket from Etsy. There are so many nice enamel pins for sale on there that it can be very difficult as to which ones to buy. Plus, it’s a great place to find spikes and studs. So far I have decided not to put any on this jacket but I may change my mind.
So what is my next project going to be? I have a distressed Killstar denim jacket that I got for very cheap, and I plan to hand-sew dystopian/post-apocalyptic film themed patches to it. Stay tuned!!!
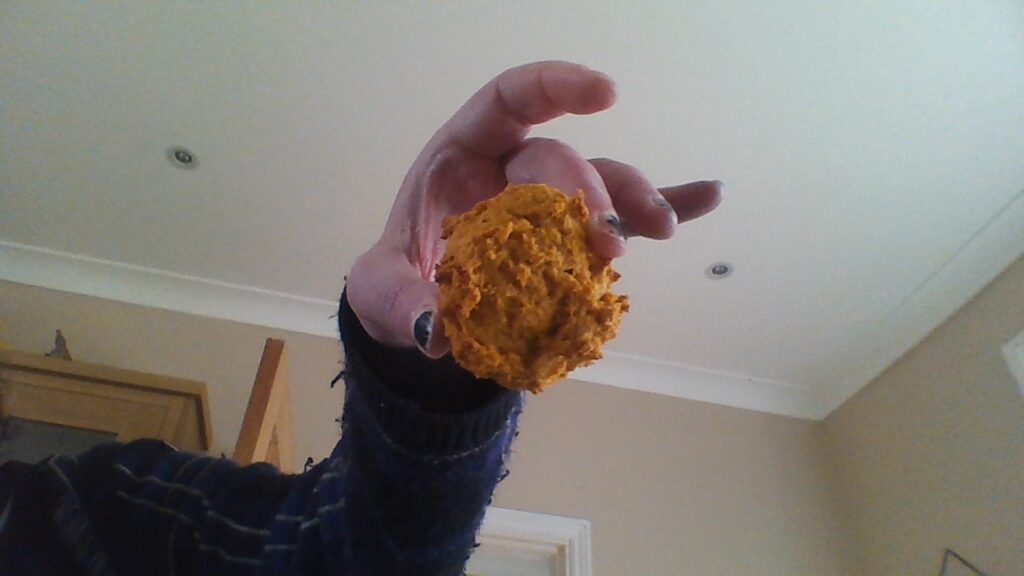
I love anything pumpkin spice flavoured. Since I am a US transplant to the UK it is very difficult for me to find anything pumpkin spice flavoured because it has not become a ‘thing’ here yet. However, Waitrose carries cans of pumpkin puree so not all hope is lost! Plus, you can just order some online along with premixed pumpkin spice.
I make this recipe on a pretty regular basis because it is so easy to do. If you have children this would be a great recipe to make with them because it’s very difficult to mess up, and it’s okay to mix it up a lot.
This recipe is from the US, so if you are in the UK you will have to make some adjustments. Don’t worry though because it’s honestly not a big deal, and I will add those details.
INGREDIENTS
1 box of spice cake mix (In the UK use 1 box of any vanilla cake mix) Mixes in the UK are slightly smaller but that doesn’t matter.
1 15 ounce can of pumpkin puree. Again the size in the UK is slightly different and that’s okay.
In the UK add 1 teaspoon of pumpkin spice blend. This is easy to order online or you can even make your own.
DIRECTIONS
Preheat oven to 350 F or 175 C (155 C for fan assisted ovens)
Line you cookie sheet with parchment baking type paper or grease your sheet.
In a large bowl empty the cake mix, and in the UK also add your pumpkin spice and blend together.
Add the can of pumpkin and stir together until all lumps are gone.
Place rounded spoonfuls onto your cookie sheet. I tend to make them a little larger but just do whatever size suits you.
Check them at 18 minutes. I always take them out when they are visibly brown on top. I like them with a little crunch. Remove them after a few minutes to a wire rack to cool.
These cookies(biscuits in the UK) are very moist and are basically little yummy cakes! I get about 26 from this mix and I can eat them all within 48 hours!
I quite often like to work on DIY clothing projects. Seeing ready made jackets with nonsensical slogans on them always makes me twitch because it is easy as hell to work on your own jacket. This was originally a pleather jacket that I got off of Killstar for very cheap on clearance. I don’t think they even have it on their site any longer. Some people would probably give me shit for buying the brand, but I wouldn’t be able to get a pleather jacket this solidly constructed for a cheaper price. The ones I’ve seen in stores are made of thinner material and are more expensive.
It is very easy to paint on pleather and leather jackets. The first thing I did was use some deglazer just to get any surface dirt or coating off of the jacket. You actually can probably skip that step, but this was my first time painting on pleather instead of leather so I did things by the book. Next, I bought an Angelus brand leather paint kit. It’s an acrylic type paint that is made to stick to leather/pleather surfaces. Also, I add their brand of 2-Hard adhesive to the paint I am working with, because it bonds the paint to a hard surface even better. I add half paint and half 2-Hard since the hard surface I am working with is hard yet flexible. I have painted on regular leather before without adding an adhesive so you only have to really do that while working with pleather.
I go over the paint several times to make it stand out more. Also, when I want to paint colours I have to put said colours on top of a white surface, because they will not show up on black very well on their own. So, you always have to paint your design starting out with white paint. I used stencils with this jacket, but I probably could have done it by hand. Since my jacket is post-apocalyptic themed I didn’t want it to look perfect, because for me that just wouldn’t look right. So messing up some outlines on it was not a big deal to me.
So get out there and create your own jacket! Put bands, drawings or whatever you like on it; let it be an extension of who you are.